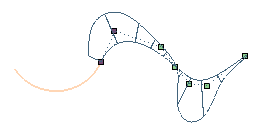
Controlling the curve continuity
When editing control points with the Curve through Control Points command, you can:
Set the continuity conditions of the selected curve with other curves
Set the continuity conditions of the selected curve with surfaces or with a free point
In addition to the possibility of having end points coincide with the end points of other curves used as references, additional options are available to enable constraining end points to:
- A point on a surface
You can constrain an end point of the curve to coincide with a selected point on a surface.
After selecting the curve, in order to constrain the first end point, under Constraints-
Continuity constraints, select
Start Reference and then click on the surface you want to set continuity conditions with. You can redefine the length of the tangent vector (forced to move in the tangent plane of the surface) in the point of connection between the curve to be modified and the surface to be connected (through the appropriate 1st Tangent Length handle/mini-dialog box pair).
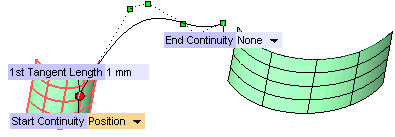
Higher order derivative information from the surface in this direction can be set using the Start Continuity drop-down list options to further smooth that transition from the curve to the surface. Further refinement of the point or direction or orientation of the cutting plane will be possible until the desired shape is achieved.
You can do the same at the second end point by selecting End Reference.
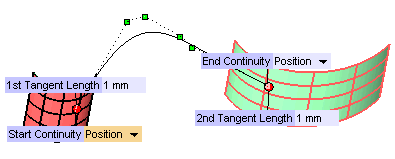
- A free point
You can constrain an end point of the curve to the position of a free point.
After selecting the curve, in order to constrain the first end point, under Constraints-
Continuity constraints, select
Start Reference and then click on the point you want to set continuity conditions with.
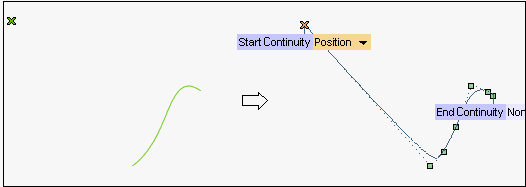
You can do the same at the second end point by clicking End Reference.
Restricting selection to curves and surface boundaries only
Please note that you can enable the command to select points, curves and surfaces or restrict selection to curves and surface boundaries only. A context menu is available when right-clicking on Start Reference or
End Reference:
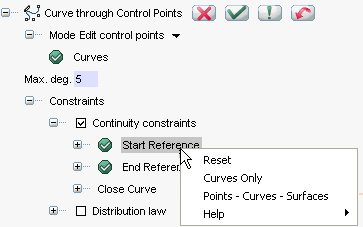
- Curves Only
restricts selection to curves and surface boundaries.
- Points - Curves - Surfaces
allows selection of points, curves and surfaces, but does not allow selection of surface boundaries.
|
Close the curve
The options of the Close Curve node under
Constraints-
Continuity constraints enable you to close a curve by moving its first end point onto the second one or vice-versa and setting continuity conditions on the new common end point.
- If you select Start point matches end point, the first end point will be moved onto the second one.

- If you select End point matches start point, the second end point will be moved onto the first one.

The curve will be closed. To obtain an open curve, though keeping the endpoints overlapping, click Open Curve.
Use the Continuity drop-down list to set the appropriate continuity constraint (
Position,
Tangent,
Curvature).
- In the Start point matches end point case, the start of the curve will be constrained to match the continuity conditions at the end of the curve to the level specified.
- In the End point matches start point case, the end of the curve will be constrained to match the continuity conditions at the start of the curve to the level specified.


