thinkPLM integration customization

Prerequisites:

  • thinkPLM configuration based on a Microsoft® SQL Server™ or Oracle® database
  • CADENAS eCATALOGsolutions 8.0 installed in a client/server configuration

After installing the integration plug-in, you will have to carry out the following customization steps in order to achieve a fully functional integration between thinkPLM and CADENAS PARTdataManager:

This customization example refers to the configuration of an Oracle® based thinkPLM configuration.


Server side customization

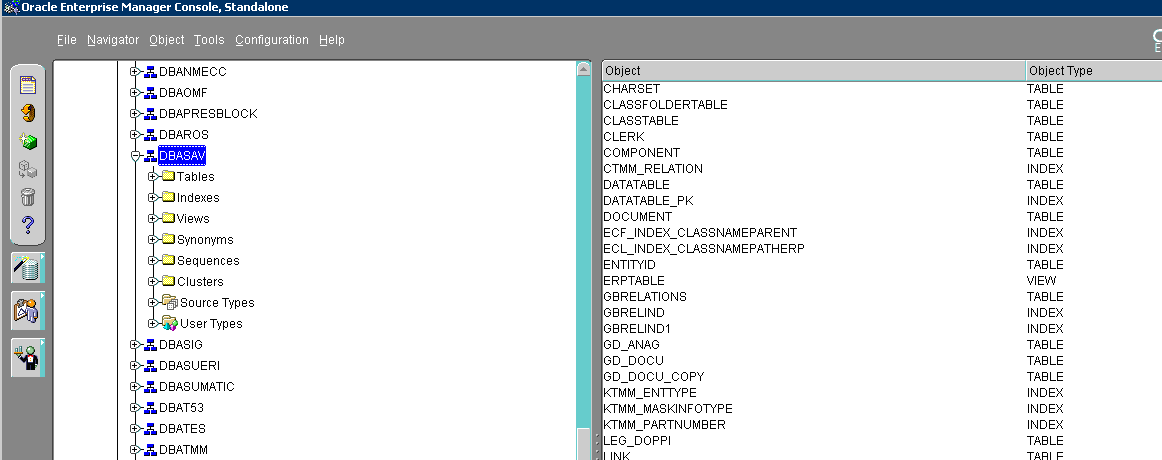
Create on the server specific tables/views in the thinkPLM database named LINKTABLE and ERPTABLE.
Using the Oracle SQL user interface, enter the following commands:

create table LINKTABLE(
PRJ_PATH varchar(500) not null,
LINE_ID integer not null,
LINE_SUBID integer not null,
VERSION varchar(15) not null,
ACTIVE_STATE smallint default 0 not null,
REQUESTED_STATE smallint default 0 not null,
VARSET varchar(4000) ,
VARIANT integer default 0,
ERP_PDM_NUMBER varchar(50),
DATA_ID integer default 0 not null,
primary key (PRJ_PATH,LINE_ID,LINE_SUBID,VERSION)) ;

CREATE VIEW ERPTABLE (ERP_PDM_NUMBER,REVSTATE,REVDES,REVPROG)
AS
SELECT RevName AS erp_pdm_number,RevState,RevDes,RevProg
FROM vTMM_COMPONENT A
where A.REVPROG in (select max(AA.RevProg) from vTMM_component AA where (A.Revname=AA.RevName)) WITH READ ONLY;

create table DATATABLE (
DATA_ID integer not null,
TOPIC varchar(50) not null,
XDATA varchar(500) not null,
constraint DATATABLE_PK primary key (DATA_ID,TOPIC));

create table CLASSFOLDERTABLE (
CLASS_NAME varchar (50) not null,
CLASS_PATH varchar (500) not null,
CLASS_PARENT varchar (500) not null,
DESCRIPTION varchar (500) not null,
PREVIEW_PATH varchar (500),
primary key (CLASS_NAME,CLASS_PATH ));

create INDEX ECF_INDEX_CLASSNAMEPARENT ON CLASSFOLDERTABLE (CLASS_NAME,CLASS_PARENT);

create table CLASSTABLE (
ERP_PDM_NUMBER varchar (50),
CLASS_NAME varchar (50) not null,
CLASS_PATH varchar (500) not null,
ACTIVE_STATE smallint default 0 not null,
REQUESTED_STATE smallint default 0 not null,
PREVIEW_PATH varchar (500),
primary key (ERP_PDM_NUMBER,CLASS_NAME,CLASS_PATH));

create INDEX ECL_INDEX_CLASSNAMEPATHERP ON CLASSTABLE (CLASS_NAME,CLASS_PATH,ERP_PDM_NUMBER);

create table PRJTABLE (
PRJ_PATH varchar (500) not null,
VKEY varchar (100) not null,
VVALUE varchar (500),
primary key (PRJ_PATH,VKEY));

create table PLMTABLE(
NB varchar(500) not null,
CAD_SYSTEM varchar(40) not null,
ERPNR varchar(50),
DIS1 char(25),
DIS2 char(3),
DIS3 char(2),
DIS4 char(3),
primary key(NB,CAD_SYSTEM));
You can find another example of these SQL commands in the file Erpstructure_81.sql located in the thinkteam\plugin\Cadenas subfolder of our product installation path.


Client side customization

On each client workstation perform the following activities:

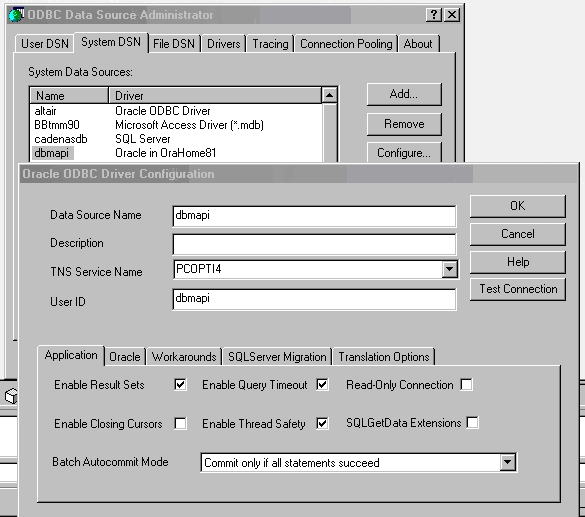
  1. Create an ODBC DSN for the database connection between the client machine and the database server:


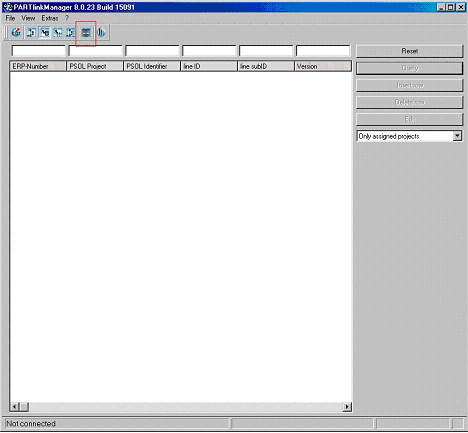
  2. Start the Cadenas PARTlinkManager Database Manager and click the following command:


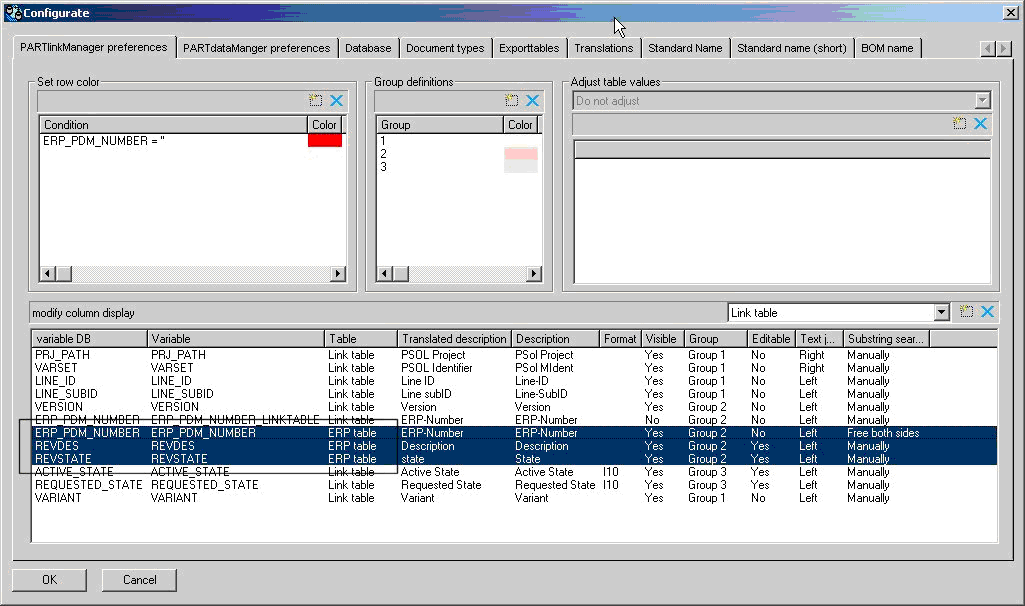
  3. In the PARTlinkManager preferences tab:


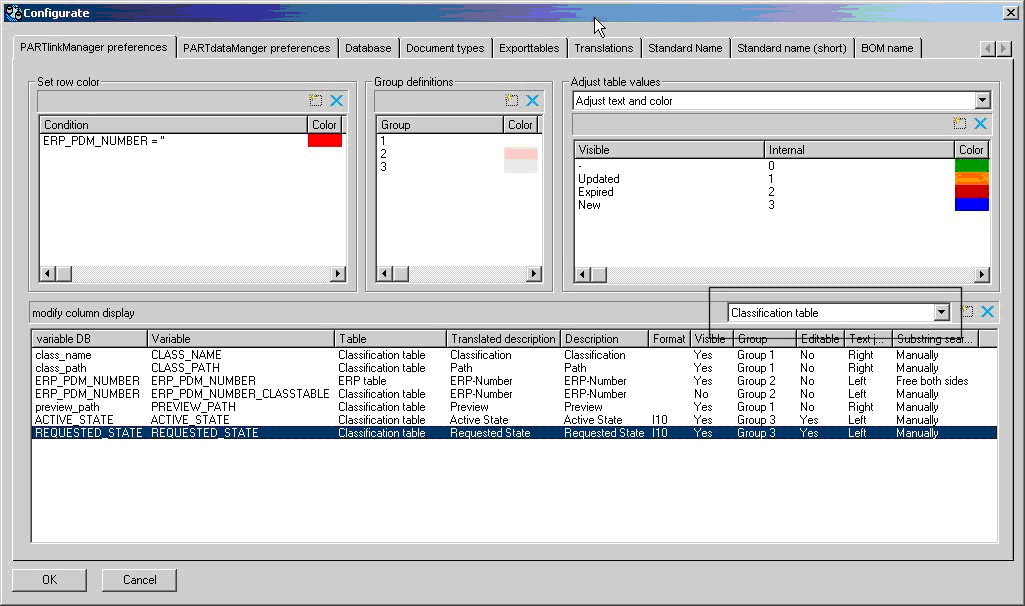
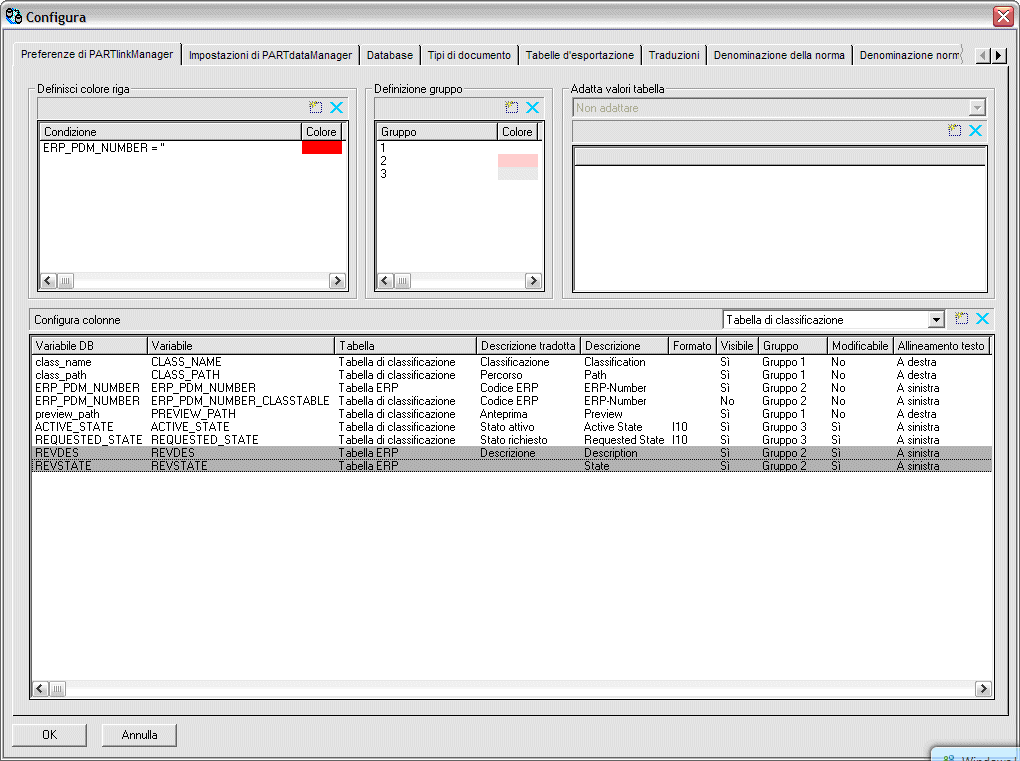
  4. In the PARTlinkManager preferences tab modify the column for Classification table. In this section keep only the standard CLASSTABLE field (delete Mat_Name and Description) as shown in the image:


  5. Add the following two columns to the Classification table required by thinkPLM:


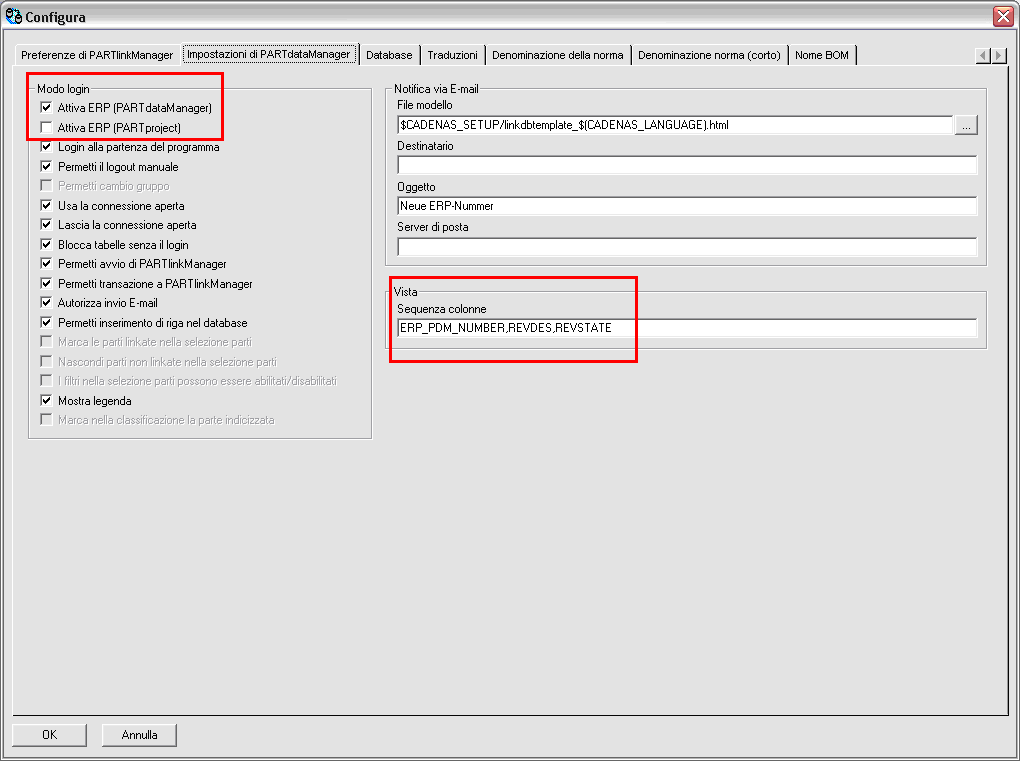
  6. In the PARTdataManager preferences tab modify the view Columns Order and check the "Activate ERP" options and login as shown in the image:


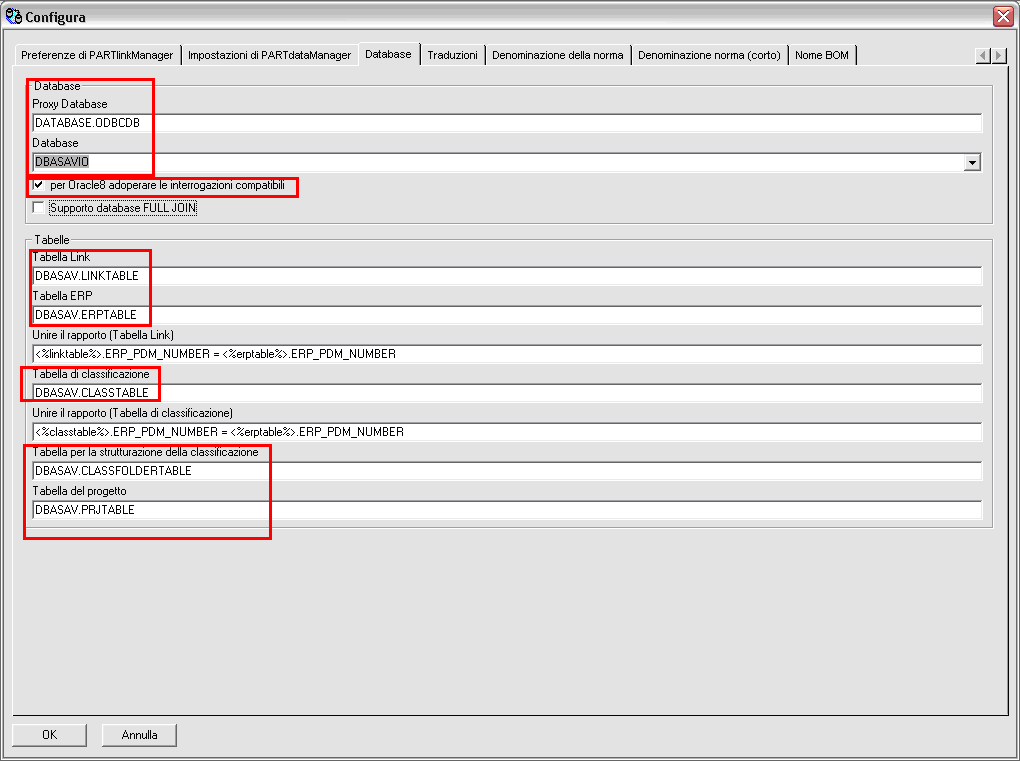
  7. In the Database tab:


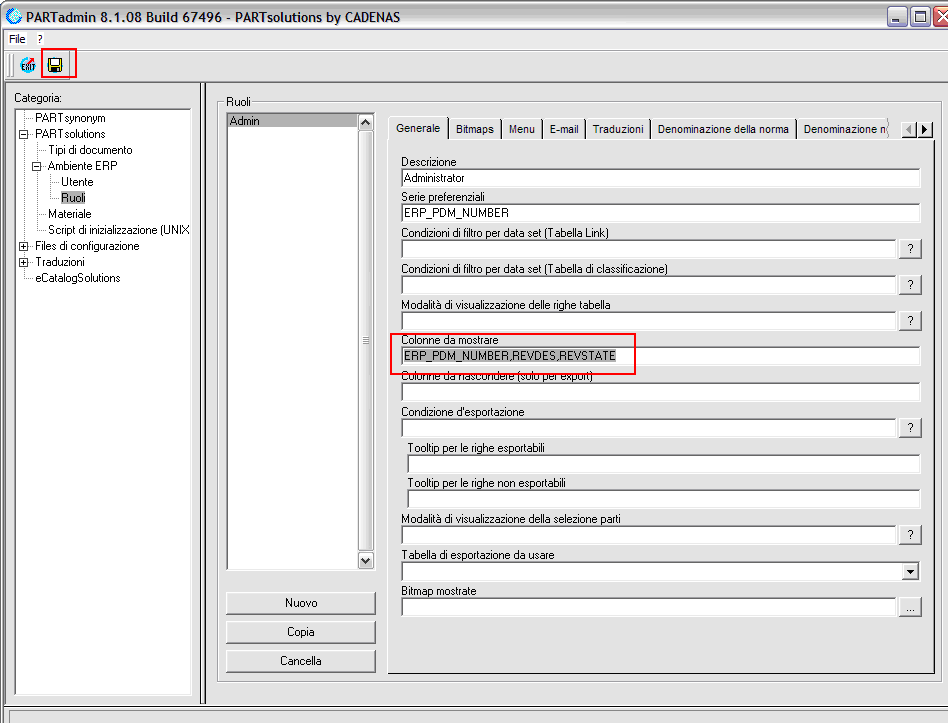
  8. From the Cadenas command folder, start the PartAdmin Installation management tool. In the Roles category, set "Columns to be displayed" for Admin to the value in the image, then save the new settings.


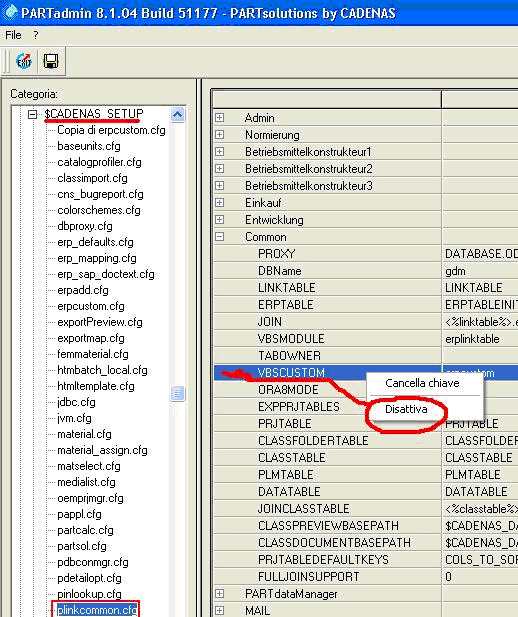
  9. Deactivate the variable VBSCUSTOM (right-click then select "Deactivate"). You find the variable in CONFIG FILES->$CADENAS_SETUP - plinkcommon.cfg


  10. Check the file Psol.ini (located in the "ext-plugins\partsolutions" subfolder of your installation folder) that the variable partnumber_fieldName is set as follows:
    partnumber_fieldName=ERP_PDM_NUMBER
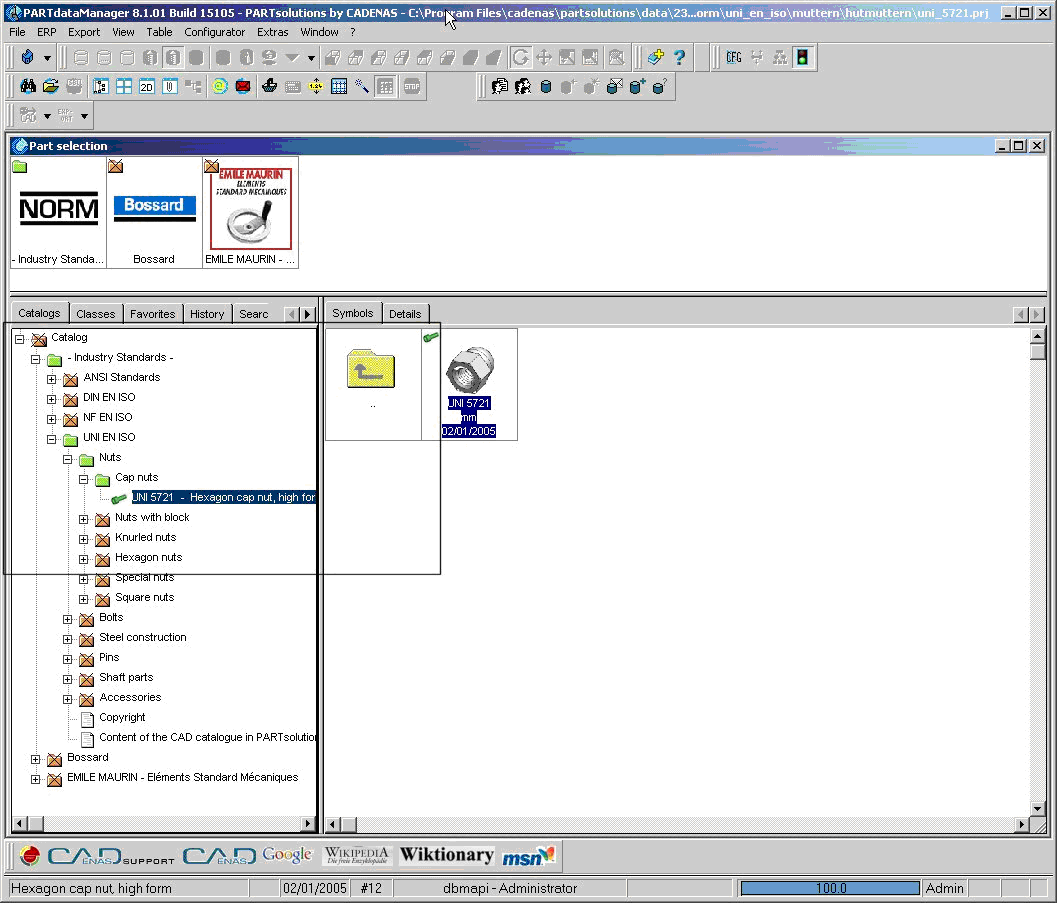
  11. Try to connect with your PartDataManager. Enter your user and password data in the login dialog menu and click OK. If this is the first time you log into the system, you see all your catalogs displayed with an orange color and crossed out, otherwise you see in green the catalogs with part numbers linked to some of the objects in them.


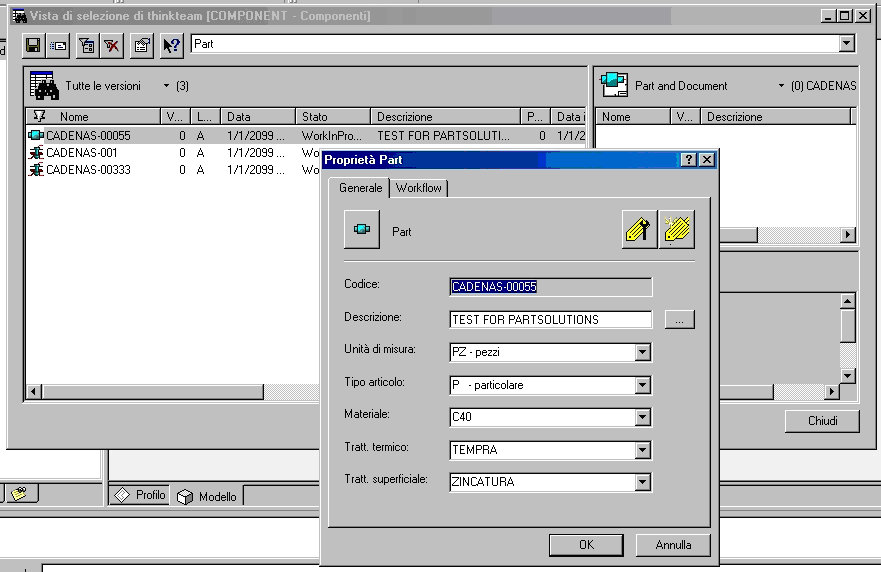
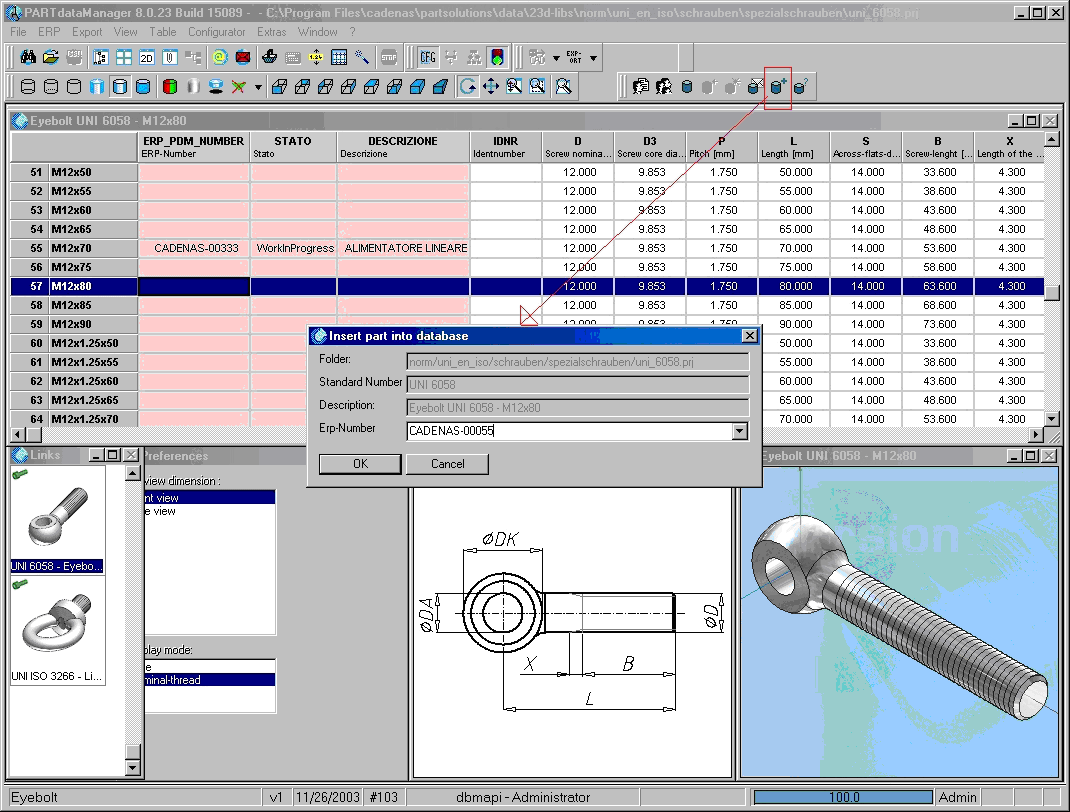
  12. Now you are able to assign a specific part number to a catalog row. Assume that you insert a new part number in thinkteam, or you already have imported into thinkteam some specific part number for Standard Parts:


    1. Open the PartDataManager, then select the catalog that contains the element to which you want associate your specific part number.
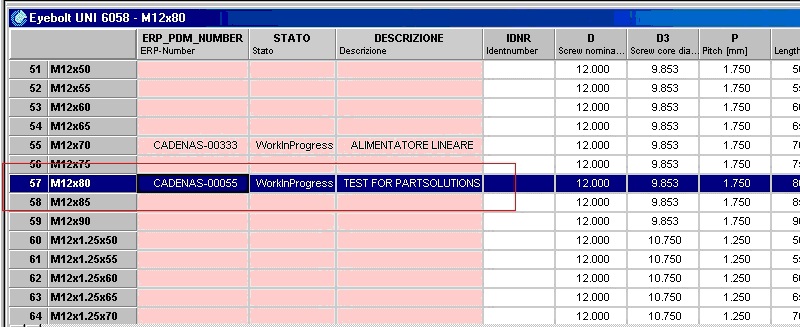
    2. Select the row, then select the 'Add record into Database' command.


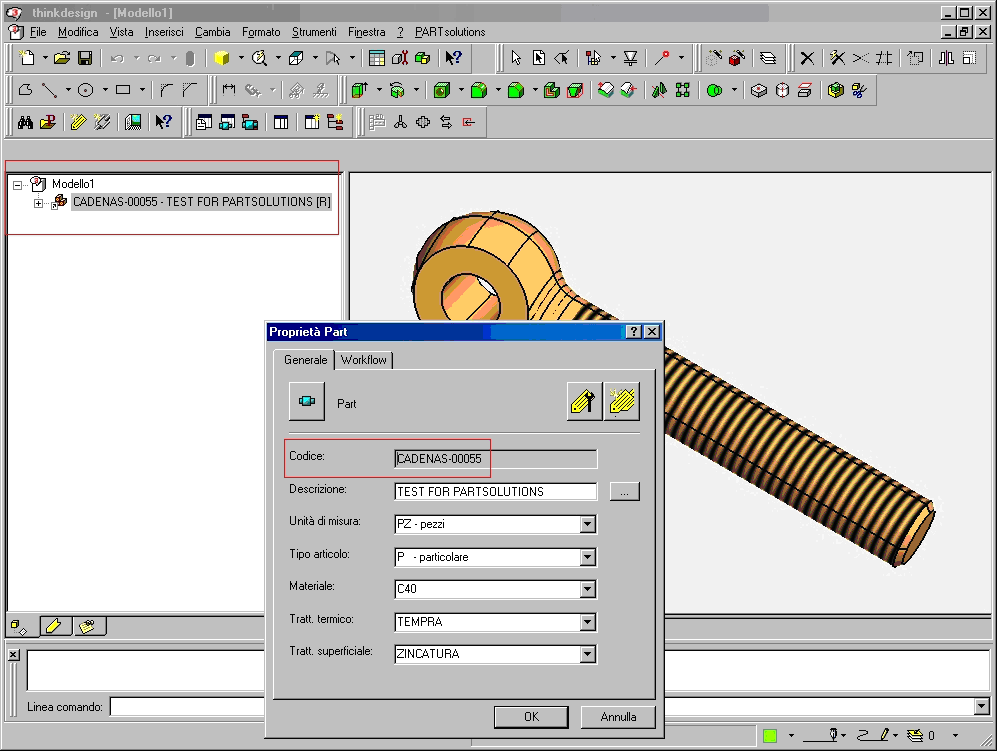
  13. You are now enabled to export the component and, it in your CAD and check the relevant part data.


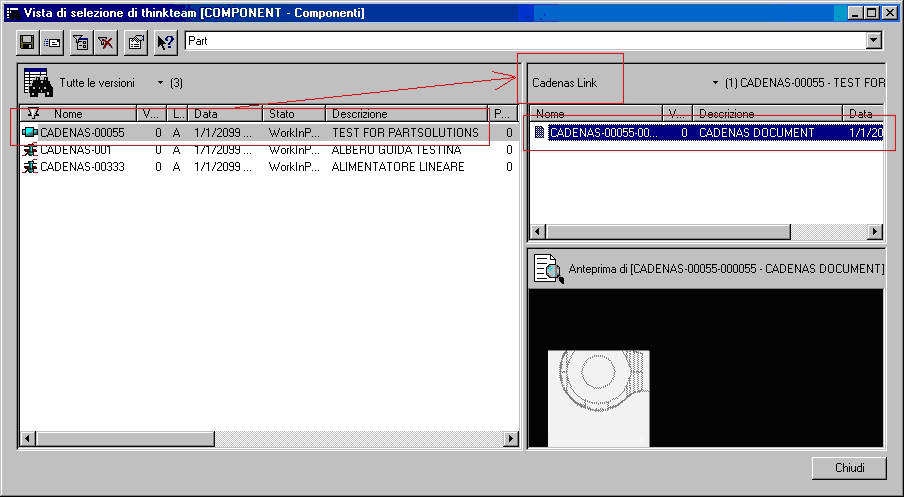
  14. Check also from a thinkteam Query View that the Part Number is linked to the new document automatically created in the specific Vault repository and linked by a specific thinkteam link type.


  15. Finally, chech that in PARTdataManager, your codified catalogs display a green icon.