| 1 |
Start the our product and open a new document. |
| |
|
| 2 |
Start the New Entity command and select a part entity type among those listed. |
| |
|
| 3 |
In the part properties dialog box that opens, enter the Part number: MASP-00055. Fill the other fields to your liking, then click OK in order to create the thinkPLM part. |
| |
|
| 4 |
Start CADENAS PARTdataManager by clicking the Import from PARTdataManager Catalog command. You are asked to log in; enter your User and Password to access the CADENAS server:
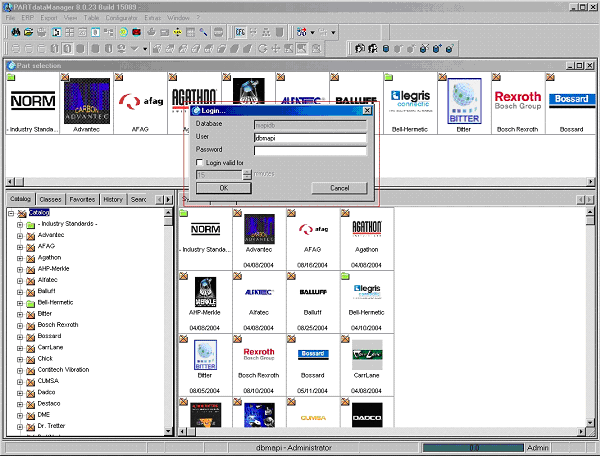
Note in the lower left corner that some catalogs have a green icon: these contain at least one object linked to a part number. Other catalogs have an orange crossed out icon: no object in these has ever been linked to a thinkPLM part number. |
| |
|
| 5 |
Open a catalog and select a row which has no part number assigned. Click the  Add record to database command and enter in the Erp-Number field the part name you created in thinkPLM: MASP-00055. Click OK to close the dialog box: Add record to database command and enter in the Erp-Number field the part name you created in thinkPLM: MASP-00055. Click OK to close the dialog box:
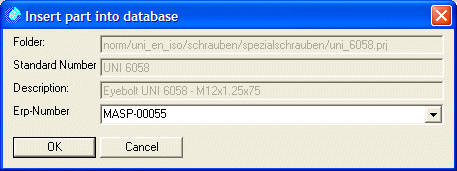
Note that in order for thinkPLM to automatically assign the part data to a component imported from the CADENAS catalogs, the Erp-Number must match a Part number:. If it does, the row in the catalog is updated with the data from the thinkPLM database:
 |
| |
|
| 6 |
You are now ready to import the component in your editor by clicking  Export. Export. |
| |
|
| 7 |
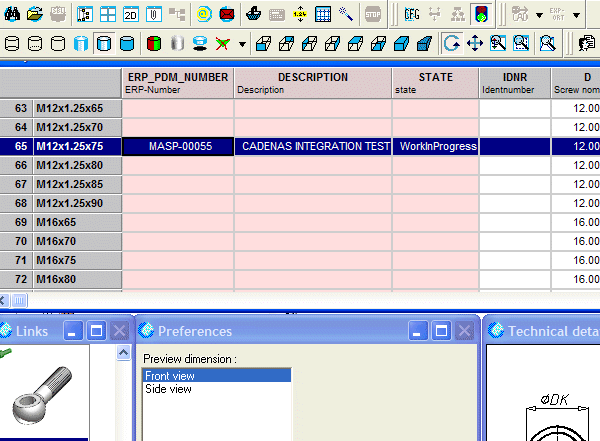
Test the results by editing the part data of the component you imported from the catalog. If successful, the Part number: is MASP-00055, and if you run a Query View on Parts to inspect MASP-00055, you should see that it has been linked to the relevant cadenas component. |