Specify each point by clicking on the position where you want to place it or by using Snap (admitted type of curve/arc snaps are: End Point, Mid Point, Arc Center, Point on Curve, Intersection Point, Joint and Surface Vertex).
Remember you can always change the selected points, by right-clicking on Points, selecting Reset in the context menu and performing the selection again.
| In case the referenced entity is itself a point entity, the selection can be multiple (using window selection). This way the command can act on point clouds. Moreover, already placed point coordinates labels can also be selected; this capability enables you to edit labels and, in case a points cloud is selected by window, it prevents from creating another label on already flagged points. |
- If the selected option is Current work plane, a text placement plane parallel to the current work plane will be displayed. The values are always calculated with respect to the global work plane and are irrespective of the current work plane position.
- If the selected option is Current view plane, a text placement plane parallel to the current view plane will be displayed.
| Inherit current property | The text is fitted inside the frame as defined by the Dimension - Text - Font & Frame settings inside the Entity Properties dialog box. |
| Rectangle | The text is fitted in a rectangular frame. |
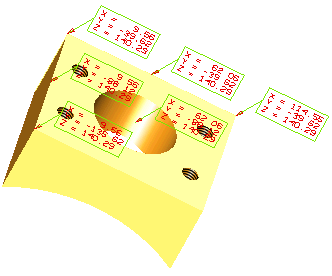
For example, if you set Decimal Digits = 4; Total Digits = 10. The label is displayed as shown in the below illustration:
- In order to choose the display of coordinate label, you can:
- In the X coordinate prefix box, type the a.
- In the Y coordinate prefix box, type the b.
- In the Z coordinate prefix box, type the c.
- In order to choose the movement of the label text along the defined direction of a distance calculated by multiplying the provided value by the text size, you can:
- In the Move text along X box, type the 2.5.
In this case the text is moved by a distance of [text size * (2.5)] along X direction. - In the Move text along Y box, type the 5.
In this case the text is moved by a distance of [text size * (5)] along y direction.
- In the Move text along X box, type the 2.5.
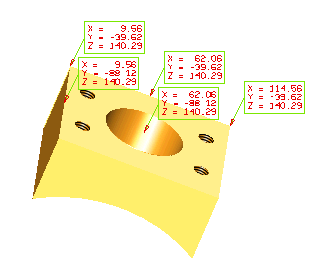
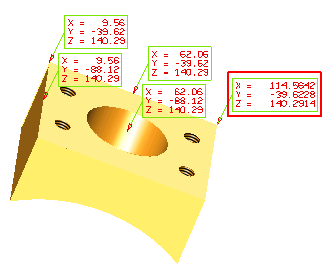
- Select the AutoArrange check box to arrange the labels without any overlap.
 or
or  to confirm your selections and actually create the coordinate labels.
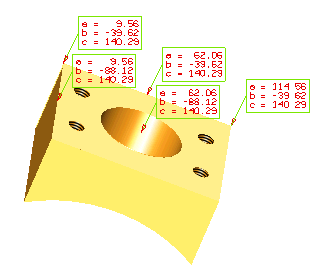
Click
 to discard your changes.